Create a Dream Garden on Less Than $200 Per Year

I had visions of gorgeous trees and shrubs, flowering perennials, masses of fresh fruits and vegetables, nesting birds, wonderful garden art, and a small pond. In other words, I wanted my perfect secret garden.
But with all this desire, I was lacking two key ingredients: patience and money. Not knowing what things actually cost, I set my budget at $100 per year, and with some learning experiences (mistakes) and determination, I did end up with a garden I really loved.
The secret? It took creativity, a willingness to work hard and adapt, and time. A low budget isn’t going to cover big structural changes like correcting a major drainage problem or building an elaborate greenhouse, but you can create a sustainable food and flower garden that will have your neighbors knocking on your gate to see more.
Here are my tips for creating a dream garden on less than $200 a year.
1. Collect realistic ideas.
My number one suggestion for new gardeners is to go on local garden tours to see what is possible and realistic in your area. Take photos and notes. Talk to the host gardeners. Find out what’s involved.
Depending on the type of garden you create, you may develop something that requires almost no upkeep (that’s my style) or many hours a week.
Most gardeners are very generous with their knowledge and will share their triumphs and failures to help you make better choices.
2. Make a plan.
As you collect information, make a plan for your space. Include the big stuff like trees, fences, sheds, decks, gazebos, and ponds.
You may not be able to afford these things now, but it’s wise to allot space for them. Your plan will probably change over time, but having one gives you somewhere to start so that each step you take contributes to the bigger vision.
Sign Up for Savings
Subscribe to get money-saving content by email that can help you stretch your dollars further.
Twice each week, you'll receive articles and tips that can help you free up and keep more of your hard-earned money, even on the tightest of budgets.
We respect your privacy. Unsubscribe at any time.
3. Learn about native plants and adapted species.
Save yourself a lot of regret by learning which plants are appropriate to grow in your area. You don’t want invasive species (that take over your garden and cause numerous problems), and neither do you want plants suited for warmer gardening zones that require too much special treatment to keep alive.
Native and well-adapted species require no watering and attract beneficial butterflies, birds, and insects.
Related: Summer Garden Maintenance Savings
4. Go natural.
A garden with a variety of native plant species becomes its own sustainable eco-system. Rather than treating symptoms, consider the cause of any plant or pest problems and adapt accordingly.
I find that by planting diversely and rotating my vegetable crops, pests get confused and move on.
5. Grow your own.
There are many ways to start new plants. I grow my vegetables and many perennials from seed. Many established perennials can be divided after a few seasons, which is beneficial both for the health of the plant and provides new ones to fill in other parts of your garden.
6. Think long term.
I know you don’t want to hear this, but it is reality. Whether you’re patient or not, growing a great, sustainable garden does (and should) take time. Short-term efforts like growing a lot of flowering annuals (plants that live their entire life cycle in one growing season) provides wonderful bursts of color, but that’s it. They’re done.
Focus on perennials (plants that live many years, and can be divided into more plants) for rewards over many seasons. And give things space. When the tag on a shrub says it will grow to eight-feet wide, believe it and plan accordingly.
7. Start where you live.
When we moved to our current home, I was daunted by a large, bare yard. Where to begin planting? The answer is to plant where you live and will really enjoy things. Don’t put that flower bed or little pond way at the back of the yard where no one can see it.
We started our new back garden by our outdoor sitting area, facing the house windows, because realistically, much of the time the garden is enjoyed from these two areas.
Front gardens are both for curb appeal and a welcoming experience on the way to the front door. Pick a priority area (front or back) and start there. You can’t do it all on a low budget, but you can work your way around, one bed at time.
8. Be willing to work.
Opportunities come up all the time that could mean free stuff for your garden. Don’t be lazy! Seize the moment.
At my previous garden, I had steep slopes that needed retaining walls. A housing development was underway nearby and they were collecting masses of rocks to be hauled away. With permission from the contractor, I came by the work site every evening and filled my car with rocks. I did this for weeks with my baby happily playing in the car seat while I carefully distributed the rocks throughout the car! I ended up with over 2000 free rocks that made my garden look great and kept the garden beds from washing away in rain storms.
9. Compost, compost, compost.
As you start planting, you’ll learn what your soil is like. I’ve had gardens in both hard clay and extreme sand and they have one thing in common. They each benefit from lots and lots of compost. Keep a backyard or balcony composter and make use of all of your fresh food scraps and egg shells. If your friends don’t compost their scraps, ask for theirs too! I save them in the freezer when I can’t get them into the composter right away.
In fall, run a mulching lawnmower over leaves to break them down and add them to the garden beds for the winter. There are nutrients in there.
Be wary of free compost giveaways. It may contain weed seeds or unwanted things like pesticides.
10. Collect water.
Install rain barrels or water catchers to collect as much rainwater as you can. This will be used for watering potted plants. Some communities offer subsidized rain barrels each spring.
11. Use raised beds.
Raised beds (made from untreated wood) are a great way to designate growing areas without requiring large amounts of compost. Instead of spreading compost over large garden beds, you just apply it right where you need it.
I use my raised beds year round, adding protective covers to them in the winter for year-round vegetable growing.
12. Decorate with garden art.
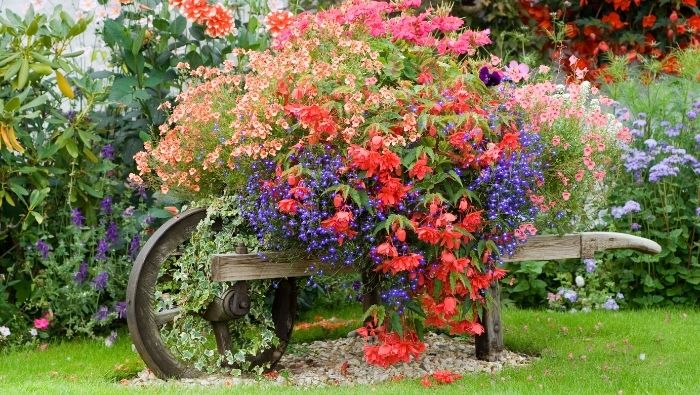
I started making garden art from repurposed household items when my garden was young and I was so impatient both to be outside and make the garden look great. There are endless possibilities for things you can make at little or no cost.
13. Give and take with other gardeners.
Gardeners are very generous people, both with their knowledge and their surplus plants. Join a garden club and/or local horticultural society and get involved. All levels of experience are always welcome. Look for local plant swaps and trunk sales. And share what you’re learning to pay it forward.
When I was starting out, several gardening friends offered me free plants. But beware! Almost all of them turned out to be invasive species. So do your homework first. Be gracious but say no if it sounds too good to be true. “Fast-growing” is a number one sign that a plant will take over your garden.
If you know what you want, tell people! It’s amazing how many people offer items when you share your wish list. And be sure to reciprocate. Also, watch for and place ads for garden plants, tools, and décor. I find lots of great tools, flower pots, and garden art ideas at local yard sales.
14. Timing is everything.
Know what you want but don’t insist on having it now. In spring, garden nurseries are packed with so many gorgeous, expensive plants. Be patient and wait it out. You may not get your top picks, but the sales will come.
I know when my local nurseries have mid-season sell-offs and their end of season sales. That’s when I’m the first one in line.
15. Enjoy the journey.
A common question is, “How long will it take for my garden to start looking good?” For me, starting from a bare lot, after about three years, my plants started to look pretty good. By year five or six, things started to really fill in. By year ten, new gardeners would knock on my gate and ask for a tour and advice.
Along the way, I learned that it really is a journey, not a destination. There’s no end goal. A garden is, of course, a living thing that will continue to change and grow and tell you what works. While I wanted a certain established look, I soon learn, beyond the perks of growing fresh food, gorgeous plants and intriguing birds, it’s simply a wonderful way to spend time.
Reviewed March 2025
About the Author
Melissa J. Will (Empress of Dirt) is a blogger and writer living in Middlesex County, Ontario, Canada (garden zone 6). She likes any excuse to be outside gardening, hiking, and making garden art from repurposed items. Please sign up for her free newsletter here.
Popular Articles

On After50Finances.com
- 9 Things You Need to Do Before You Retire
- You Didn’t Save Enough for Retirement and You’re 55+
- When Empty Nesters Reorganize and Declutter Their Home
- Reinventing Your Career in Your 50s or 60s
- What Mature Homeowners Should Know about Reverse Mortgages
- 2 Reasons to Collect Social Security Benefits As Soon As Possible

