Money-Saving Boiling Water Bath Canning Basics

Learning to can your own foods can reduce food costs. These boiling water bath canning basics and guidelines can get you started.
Canning in a boiling water bath is safe for most tomatoes and fruits when the natural acids and sugars are enough to help preserve them. It’s safe to make jam, jelly and other preserves when sugar is a principal preserver, and pickled products when acid is the principal preserver.
To can in a boiling water bath, food is put into jars with lids and rings intact and covered with – you guessed it – boiling water.
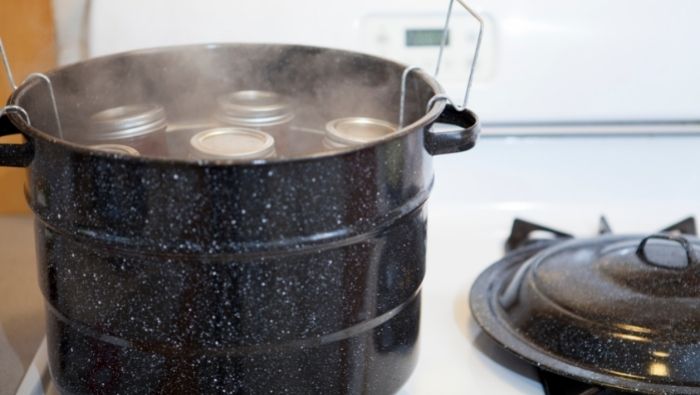
Almost any pot can be used for a boiling water bath, as long as it’s deep enough to cover your jars with at least an inch of water and still have room for the water to boil. It will need a closely fitting lid to keep the water from boiling away, but not a tightly sealing lid. It’s best to have a rack to set jars in so they won’t bounce around in the boiling water and break. Canners made for this purpose come with a rack with handles to lift the jars from the water all at the same time.
There are varying times required according to the density and type of food being canned, so never can without knowing what they are. Times for almost any food or combination can be found in books or on the Internet.
Start living better for less.
Subscribe to get money-saving content by email that can help you stretch your dollars further.
Twice each week you'll receive articles and tips that can help you free up and keep more of your hard-earned money, even on the tightest of budgets.
Subscribers receive a free copy of our eBook Little Luxuries: 130 Ways to Live Better for Less.
We respect your privacy. Unsubscribe at any time.
Getting started
Gather your equipment, such as canner, rack, jars, lids, rings, tongs and food. Prepare the food according to your recipe. Make sure jars are clean and plan where to put what. Most kitchens are not arranged to can conveniently, so you might have to make some adjustments. When you’re all ready, proceed. (See Tips for Buying Used Canning Equipment.)
Have the food ready according to your recipe or instructions. Be sure you have enough liquid to cover the food in each jar, and hold it all at the correct temperature.
Put your canner on the stove and fill it a little over half way with water. Put a large kettle on with extra hot water and set them both to boil. Put lids and rings in very hot water.
Filling and preparing your jars
Fill jars with the food according to recipe instructions, paying attention to how much headspace it needs. Push a knife down the side of foods like sliced pickles to release air bubbles. Wipe the rim of the jar with a clean, damp cloth and put a hot lid on it, then a ring (screwband), and tighten it finger tight.
Set each jar as you finish into the canner. A jar lifter is great for this. When the canner is filled with jars, add enough boiling water to cover them by about two inches. Don’t pour the boiling water directly onto the jar tops as it may cause premature sealing.
Boling and cooling your jars
Put the lid on and bring the water to a full rolling boil, starting to time it only when it’s completely boiling. Check it now and then and add boiling water if needed. Never let the water drop below boiling temperature until time is up.
As soon as the time is up, remove jars by lifting the whole rack out of the canner or by lifting individual jars with a jar lifter. Set the jars on the towel or low cooling rack in a safe place, leaving at least an inch between each jar.
Don’t move the jars for 24 hours, then check for seals, wipe the jars if needed and store. If you do much canning, put a date on each jar, and if there’s any doubt as to what the contents are, mark that, too.
If a jar has not sealed, refrigerate it and use it within a day or two.
Reviewed July 2021
Subscribe to The Dollar Stretcher, our free twice-weekly newsletter aimed at helping you live better for less on the money you already have!
Subscribers get a copy of our ebook Little Luxuries: 130 Ways to Live Better...For Less for FREE!
Popular Articles
On After50Finances.com
- 9 Things You Need to Do Before You Retire
- You Didn’t Save Enough for Retirement and You’re 55+
- When Empty Nesters Reorganize and Declutter Their Home
- Reinventing Your Career in Your 50s or 60s
- What Mature Homeowners Should Know about Reverse Mortgages
- 2 Reasons to Collect Social Security Benefits As Soon As Possible


